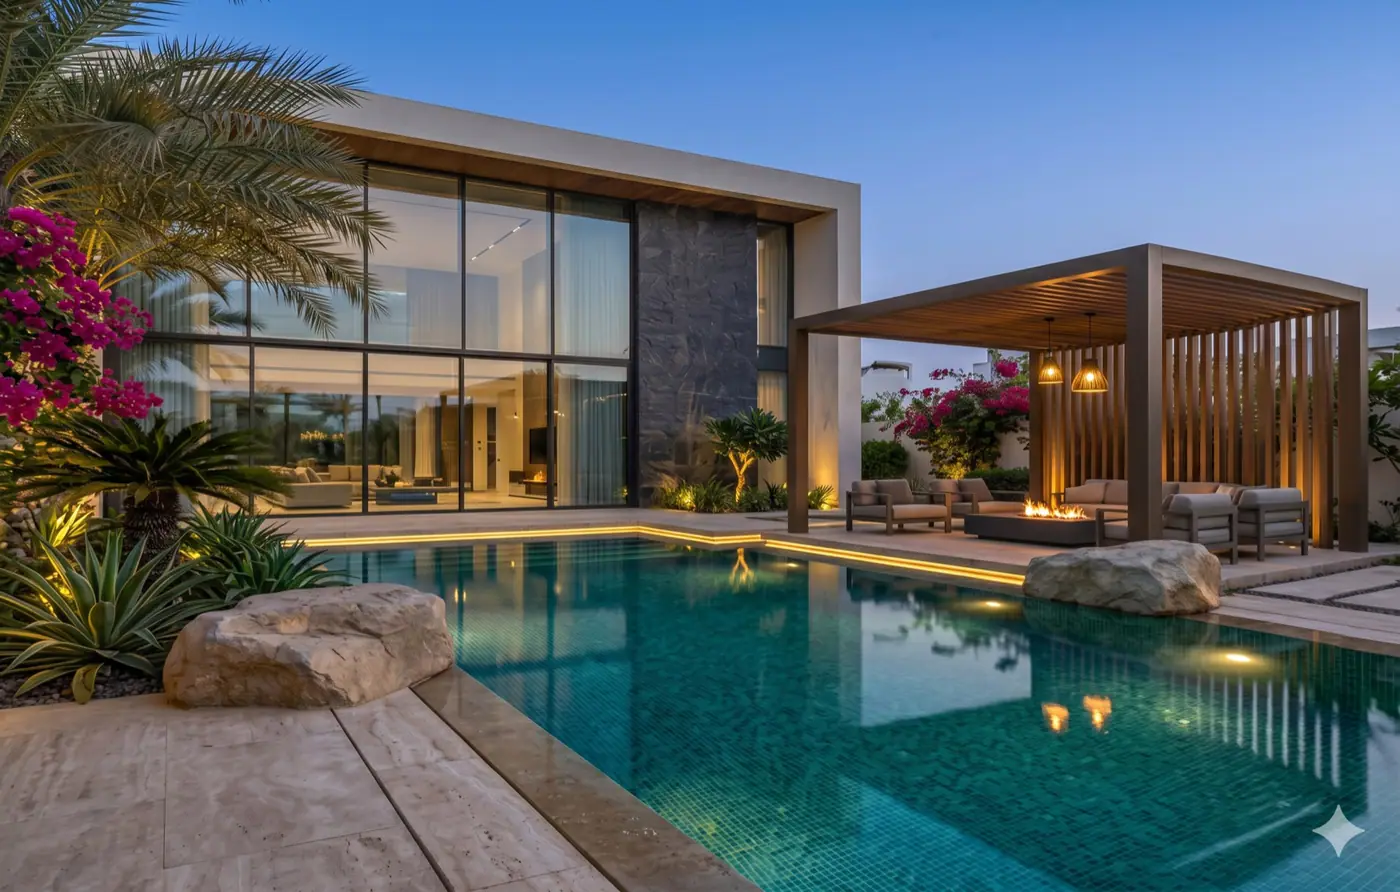
What to know
- Identify walking routes, level changes and seating before placing decorative fixtures.
- Aim and shield light so it serves the intended surface without glaring across the pool.
- Separate functional, garden and pool-feature circuits and controls.
- Use qualified design and installation for equipment near water.
- Light a Dubai villa pool area in layers: make routes and steps easy to read, give seating its own comfortable scene, and treat underwater features as a separate design and electrical package.
Quick answer: Light a Dubai villa pool area in layers: make routes and steps easy to read, give seating its own comfortable scene, and treat underwater features as a separate design and electrical package. More brightness is not automatically more useful; glare can make the space harder to use.
A pool can look luminous in a rendering yet leave its surrounding steps dark. Begin with a night-time walk-through: where do people leave the villa, set down towels, cross the deck and enter the pool? Mark the safety and navigation tasks first. Then add the softer light that makes planting, a pergola or a feature wall part of the evening scene.
Map the evening journey before placing fixtures
Draw the route from the villa to the pool, changing room, outdoor dining area and garden gate. Mark steps, changes in paving level, corners and places where furniture might obstruct movement. Then identify where people spend time: a dining table needs a different quality of light from a path or a view across planting. This map gives the designer a reason for every fixture and helps keep important routes visible when decorative scenes are dimmed.
Consider the view from inside the home as well as from the deck. A bright fixture aimed toward a glazed door can dominate the indoor view at night. A low path light may be comfortable for someone walking toward the pool but glare at a person seated across it. Ask for the proposed beam direction to be marked on the plan. If there is an existing garden, a temporary night-time mock-up can reveal these problems before trenches or hardscape are finalised.
Do not let a dramatic pool image replace functional planning. Underwater light may reveal the water beautifully yet leave a wet step, gate latch or change of level in shadow. Conversely, flooding the whole terrace with one powerful source can flatten the planting and create reflections across the water. Start with the essential route and task layers; build the atmosphere around them.
How do you avoid glare?
Position fixtures so the light source is not in the normal line of sight from a seat or across the water. Shield and aim path lights at the walking surface; test how pale paving and water reflect the beam. The US National Park Service’s outdoor-lighting principles recommend targeted, shielded, controlled and warmer-coloured light where appropriate. These are general design principles, not a substitute for the project’s local electrical and pool-safety requirements.
Look at the fitting, not only at its catalogue photograph. A visible point of light can feel harsh even when its total output is modest. Ask whether it has shielding, can be aimed precisely and remains comfortable from the usual seating positions. Review reflections on polished stone, glass and water after dark. A fixture that looks restrained in a daytime sample may produce a distracting streak in the pool or on a villa window.
Colour temperature should support the intended materials and people using the space. Ask for a sample against the actual paving and planting rather than choosing from a screen. Consistency matters: an accidental mix of very different whites across steps, walls and garden features can make the project feel fragmented. If colour-changing pool features are wanted, give them a deliberate separate scene so everyday route lighting remains dependable.
Which scenes are worth controlling separately?
A practical plan might distinguish an arrival route, pool-deck circulation, dining, garden accents and underwater feature lighting. Separate controls let the family reduce decorative lighting without losing the route back to the villa. If automation is used, document manual control, default behaviour after a power interruption and who can change the scenes.
Describe scenes in the language of use: “arriving home,” “dining,” “pool in use” and “quiet garden” are more helpful to a family than unexplained circuit numbers. For each scene, show which fixtures remain on and which may dim or switch off. A late-night route should not depend on the owner finding an app or remembering a voice command. Place straightforward manual controls where people naturally enter and leave the outdoor area.
Where motion or schedules are proposed, ask what triggers them and how they behave when guests are seated quietly. A timer that unexpectedly darkens a step is not an elegant automation. Test whether the system recovers sensibly after a power interruption and whether someone can use the garden if the network or smart-home hub is offline. These questions belong in the design brief, not only in a technical manual after installation.
Underwater lights, drivers, cabling and connections must be specified for their location and installed by qualified people. Ask for equipment data, circuit and isolation details, access for service and a commissioning record. Do not treat a generic outdoor fixture or an improvised extension cable as suitable for a wet pool environment.
Separate pool equipment from garden ambience
Water and electrical equipment require a location-specific design. Have a qualified designer or installer identify suitable fixtures, cable routes, connection methods, protection and isolation under the requirements applicable to the project. The homeowner should not have to infer compliance from an “outdoor rated” label. Ask who is responsible for the interface between the pool contractor and landscape electrician and which tests they will record before the deck is closed.
Think ahead to replacement. Can an underwater fitting be serviced according to its manufacturer’s method? Can a driver be reached without breaking a planter or lifting finished paving? Are components labelled so the maintenance team knows what to isolate? A slightly less hidden, properly accessible service location can preserve the clean visual result for years longer than a sealed box nobody can reach.
Keep circuits and controls understandable. Pool feature light, garden uplights, step lighting and dining pendants should not be tied together only because one cable route was convenient. The drawings should identify each group and its switch, controller or driver. That makes it easier to maintain the useful lighting if a decorative component later fails.
Connect lighting to the landscape
Coordinate fixture locations before new paving, planting or pergola foundations are built. Leave maintenance access to drivers and avoid fixtures that will be swallowed by mature shrubs. Green Earth’s lighting and irrigation service can be planned with pool construction and smart-home controls. The smart-villa guide covers how outdoor systems connect to the wider home.
Discuss planting at its expected mature size. A small shrub can grow over a low fitting, changing the beam and trapping debris around it. A tree uplight should be positioned for the trunk and canopy that will exist later, while still allowing a gardener to work safely. Mark irrigation heads too: repeated overspray onto a fitting or driver location is a coordination error worth preventing before trenches are backfilled.
On a pergola, ask how the lighting integrates with structure, fan or shade equipment and whether any visible wiring will spoil the underside. If the pool deck is being rebuilt, coordinate cable sleeves before the finish is laid. If it is an existing deck, assess the disruption and reinstatement required rather than assuming a new lighting scene can be added invisibly.
How should you compare quotations and sign off the work?
Compare a fixture schedule, not just a total price. It should name the purpose, position, type, finish, light output or beam where relevant, control group, driver location and access method for each element. Ask what is included for cable routes, waterproof or wet-area details, testing, scene programming and repair of disturbed surfaces. A proposal with impressive visualisations but no control or service plan has unresolved costs.
Commission after dark with the people who will use the space. Walk every route, sit in the normal seating positions, view the pool from indoors and test the scenes. Adjust aim and dimming where the design permits, then record the final settings. Ask for a demonstration of manual operation and isolation, labelled drawings, product information and the person to contact if a circuit fails. A night-time handover is how a lighting design becomes a usable outdoor room.
Bring a marked site plan and the family’s evening-use pattern to the first meeting. Discuss a poolside lighting plan with Green Earth before trenches and deck finishes are closed.
Questions about this topic
What is the key takeaway from Poolside Landscape Lighting in Dubai: Layers, Glare and Controls?
Identify walking routes, level changes and seating before placing decorative fixtures. Aim and shield light so it serves the intended surface without glaring across the pool.
How do you avoid glare?
Position fixtures so the light source is not in the normal line of sight from a seat or across the water. Shield and aim path lights at the walking surface; test how pale paving and water reflect the beam. The US National Park Service's outdoor-lighting principles recommend targeted, shielded, controlled and warmer-coloured light where appropriate. These are general design principles, not a...
Which scenes are worth controlling separately?
A practical plan might distinguish an arrival route, pool-deck circulation, dining, garden accents and underwater feature lighting. Separate controls let the family reduce decorative lighting without losing the route back to the villa. If automation is used, document manual control, default behaviour after a power interruption and who can change the scenes. Describe scenes in the language of use: “arriving home,” “dining,”...
How should you compare quotations and sign off the work?
Compare a fixture schedule, not just a total price. It should name the purpose, position, type, finish, light output or beam where relevant, control group, driver location and access method for each element. Ask what is included for cable routes, waterproof or wet-area details, testing, scene programming and repair of disturbed surfaces. A proposal with impressive visualisations but no control or service...